Step 1 – Creating a Consent
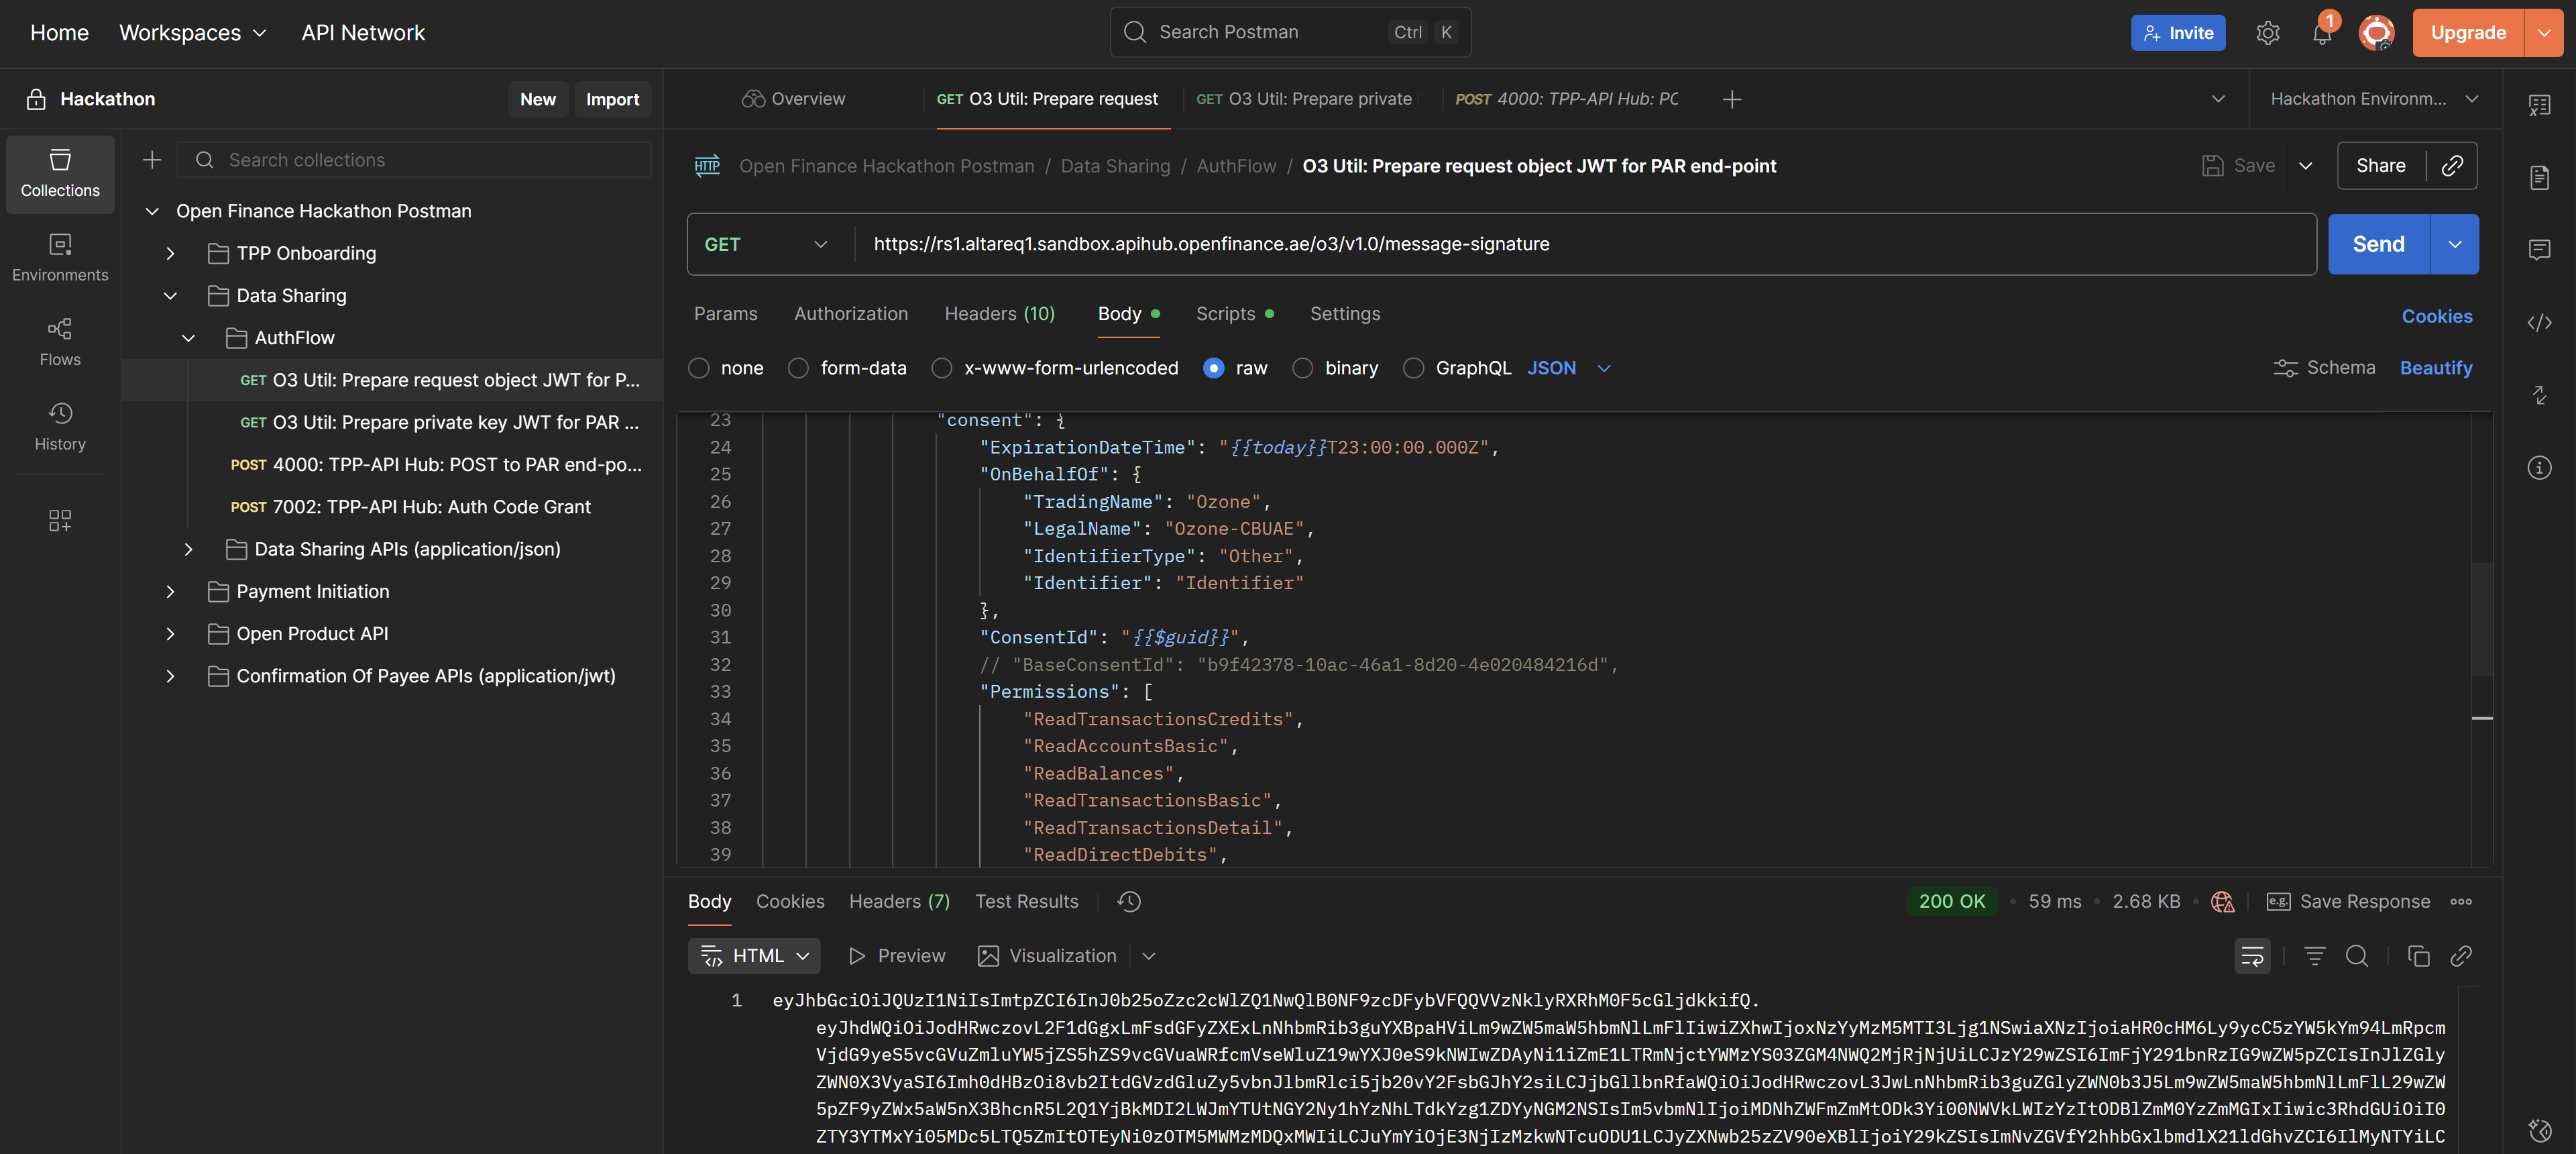
Before initiating a bank data sharing request, you must first create a consent request. This involves making the following three requests in sequence:1. O3 Util: Prepare request object JWT for PAR endpoint
Endpoint:https://rs1.altareq1.sandbox.apihub.openfinance.ae/o3/v1.0/message-signature
Purpose:This request converts the RAR object in the body into a JWT signed with your private signing key.
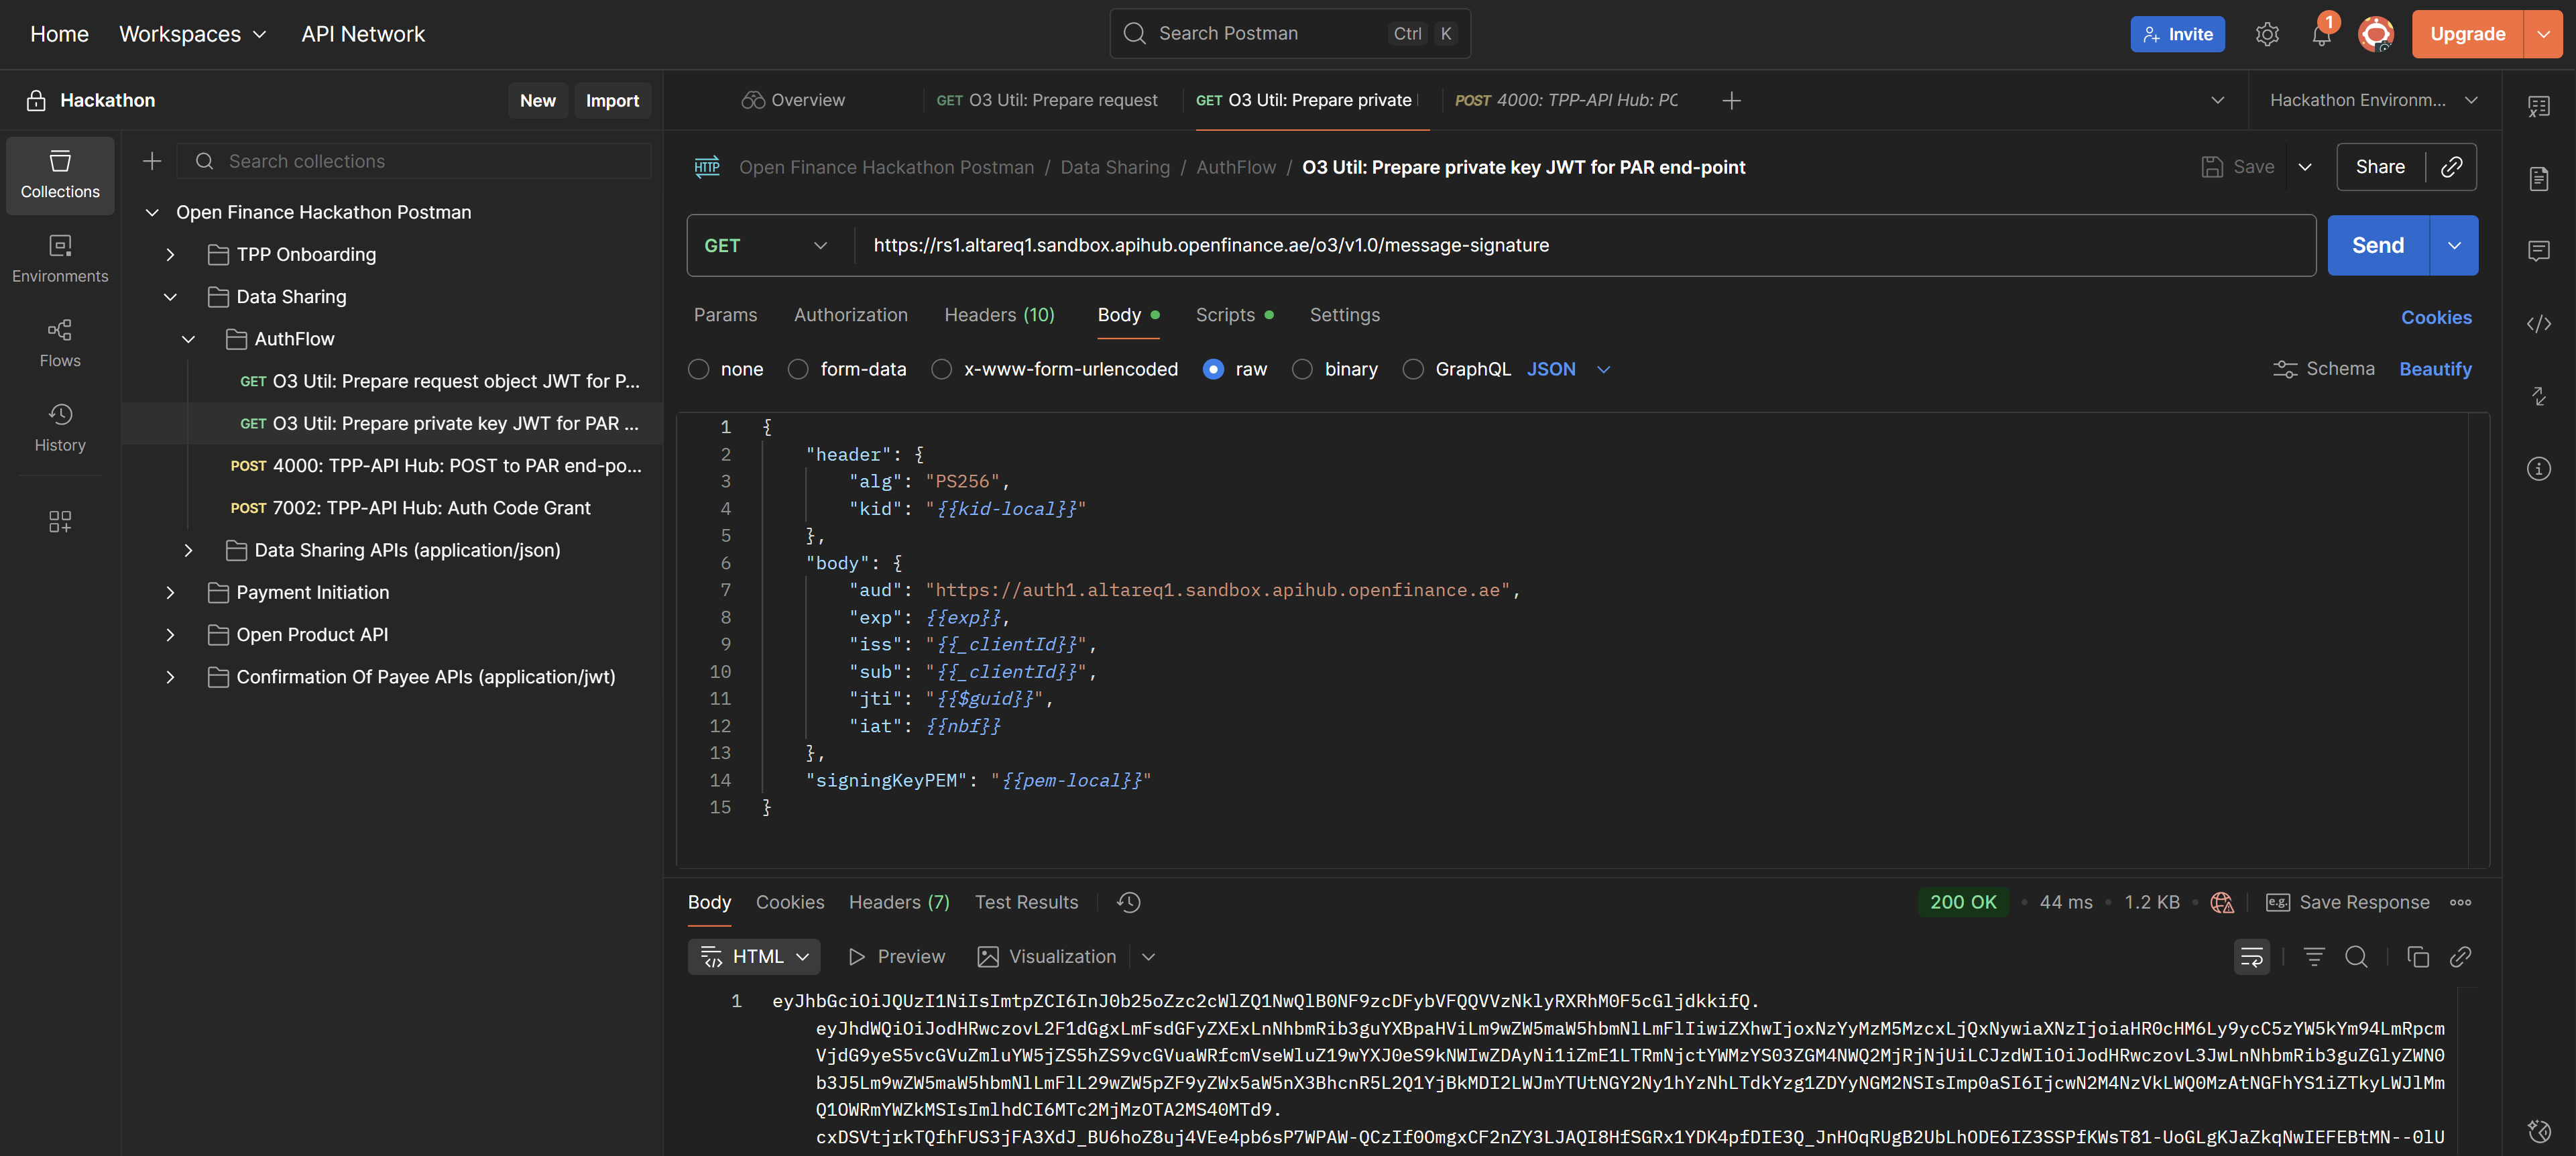
2. O3 Util: Prepare private key JWT for PAR endpoint
Endpoint:https://rs1.altareq1.sandbox.apihub.openfinance.ae/o3/v1.0/message-signature
Purpose:This request converts the RAR object in the body into a JWT signed with your private signing key, creating your Client Assertion.
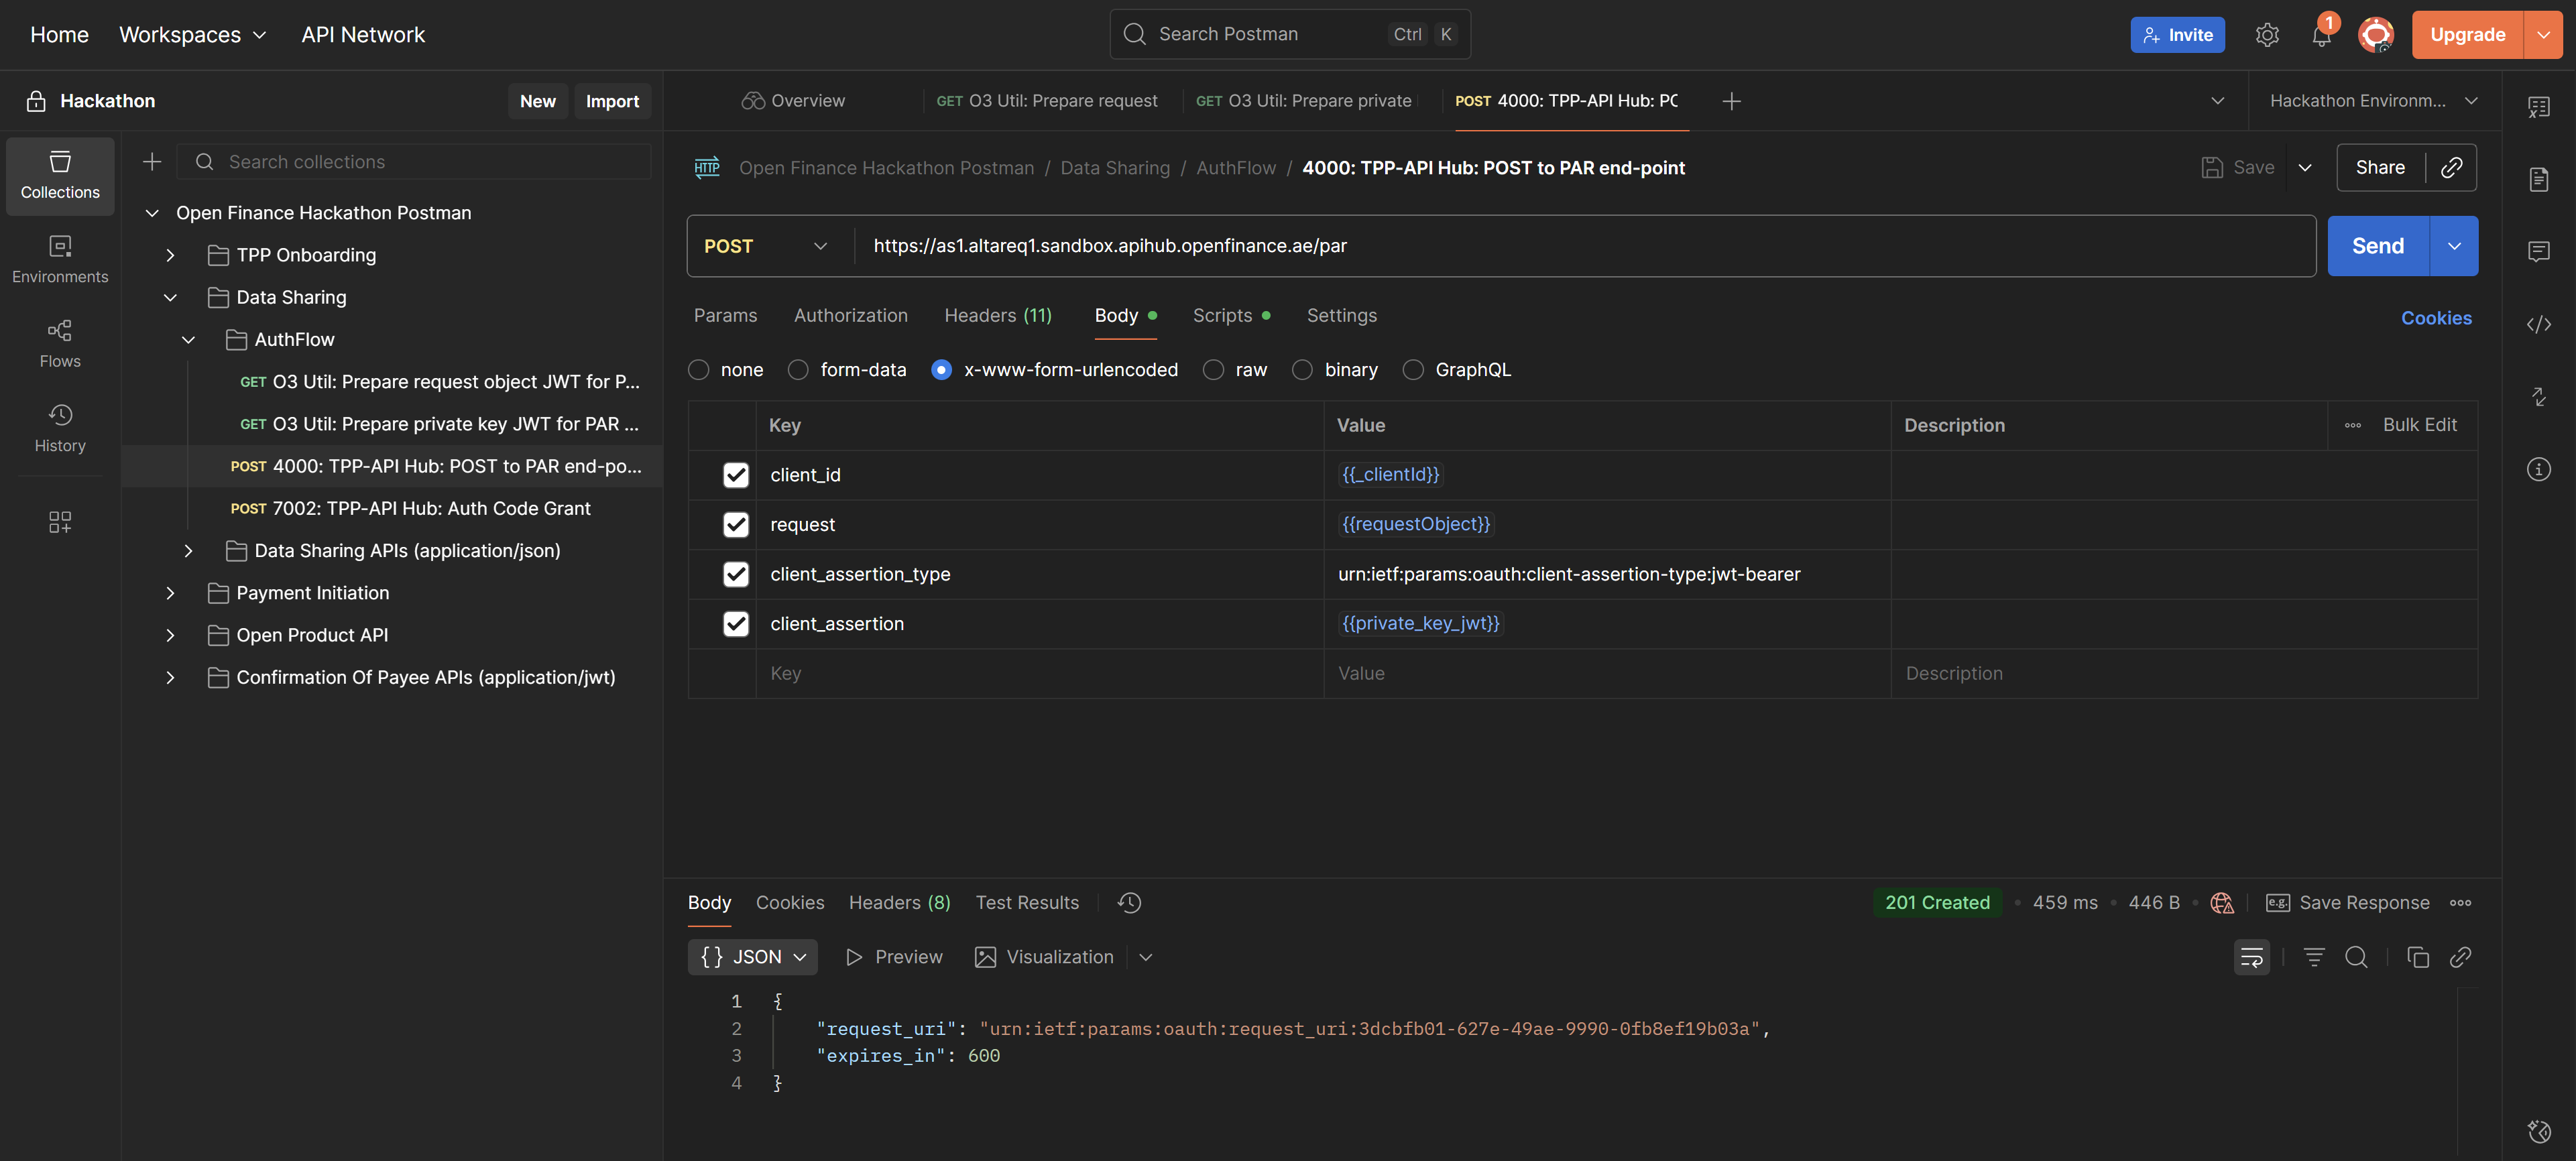
3. 4000: TPP-API Hub – POST to PAR endpoint
Endpoint:https://as1.altareq1.sandbox.apihub.openfinance.ae/par
Purpose:This request sends the JWTs constructed in the O3 Utils to the AlTareq Model Bank’s authorization server to stage the consent.
It returns the details required to construct the redirect to the Model Bank, allowing the user to complete authentication and authorization.
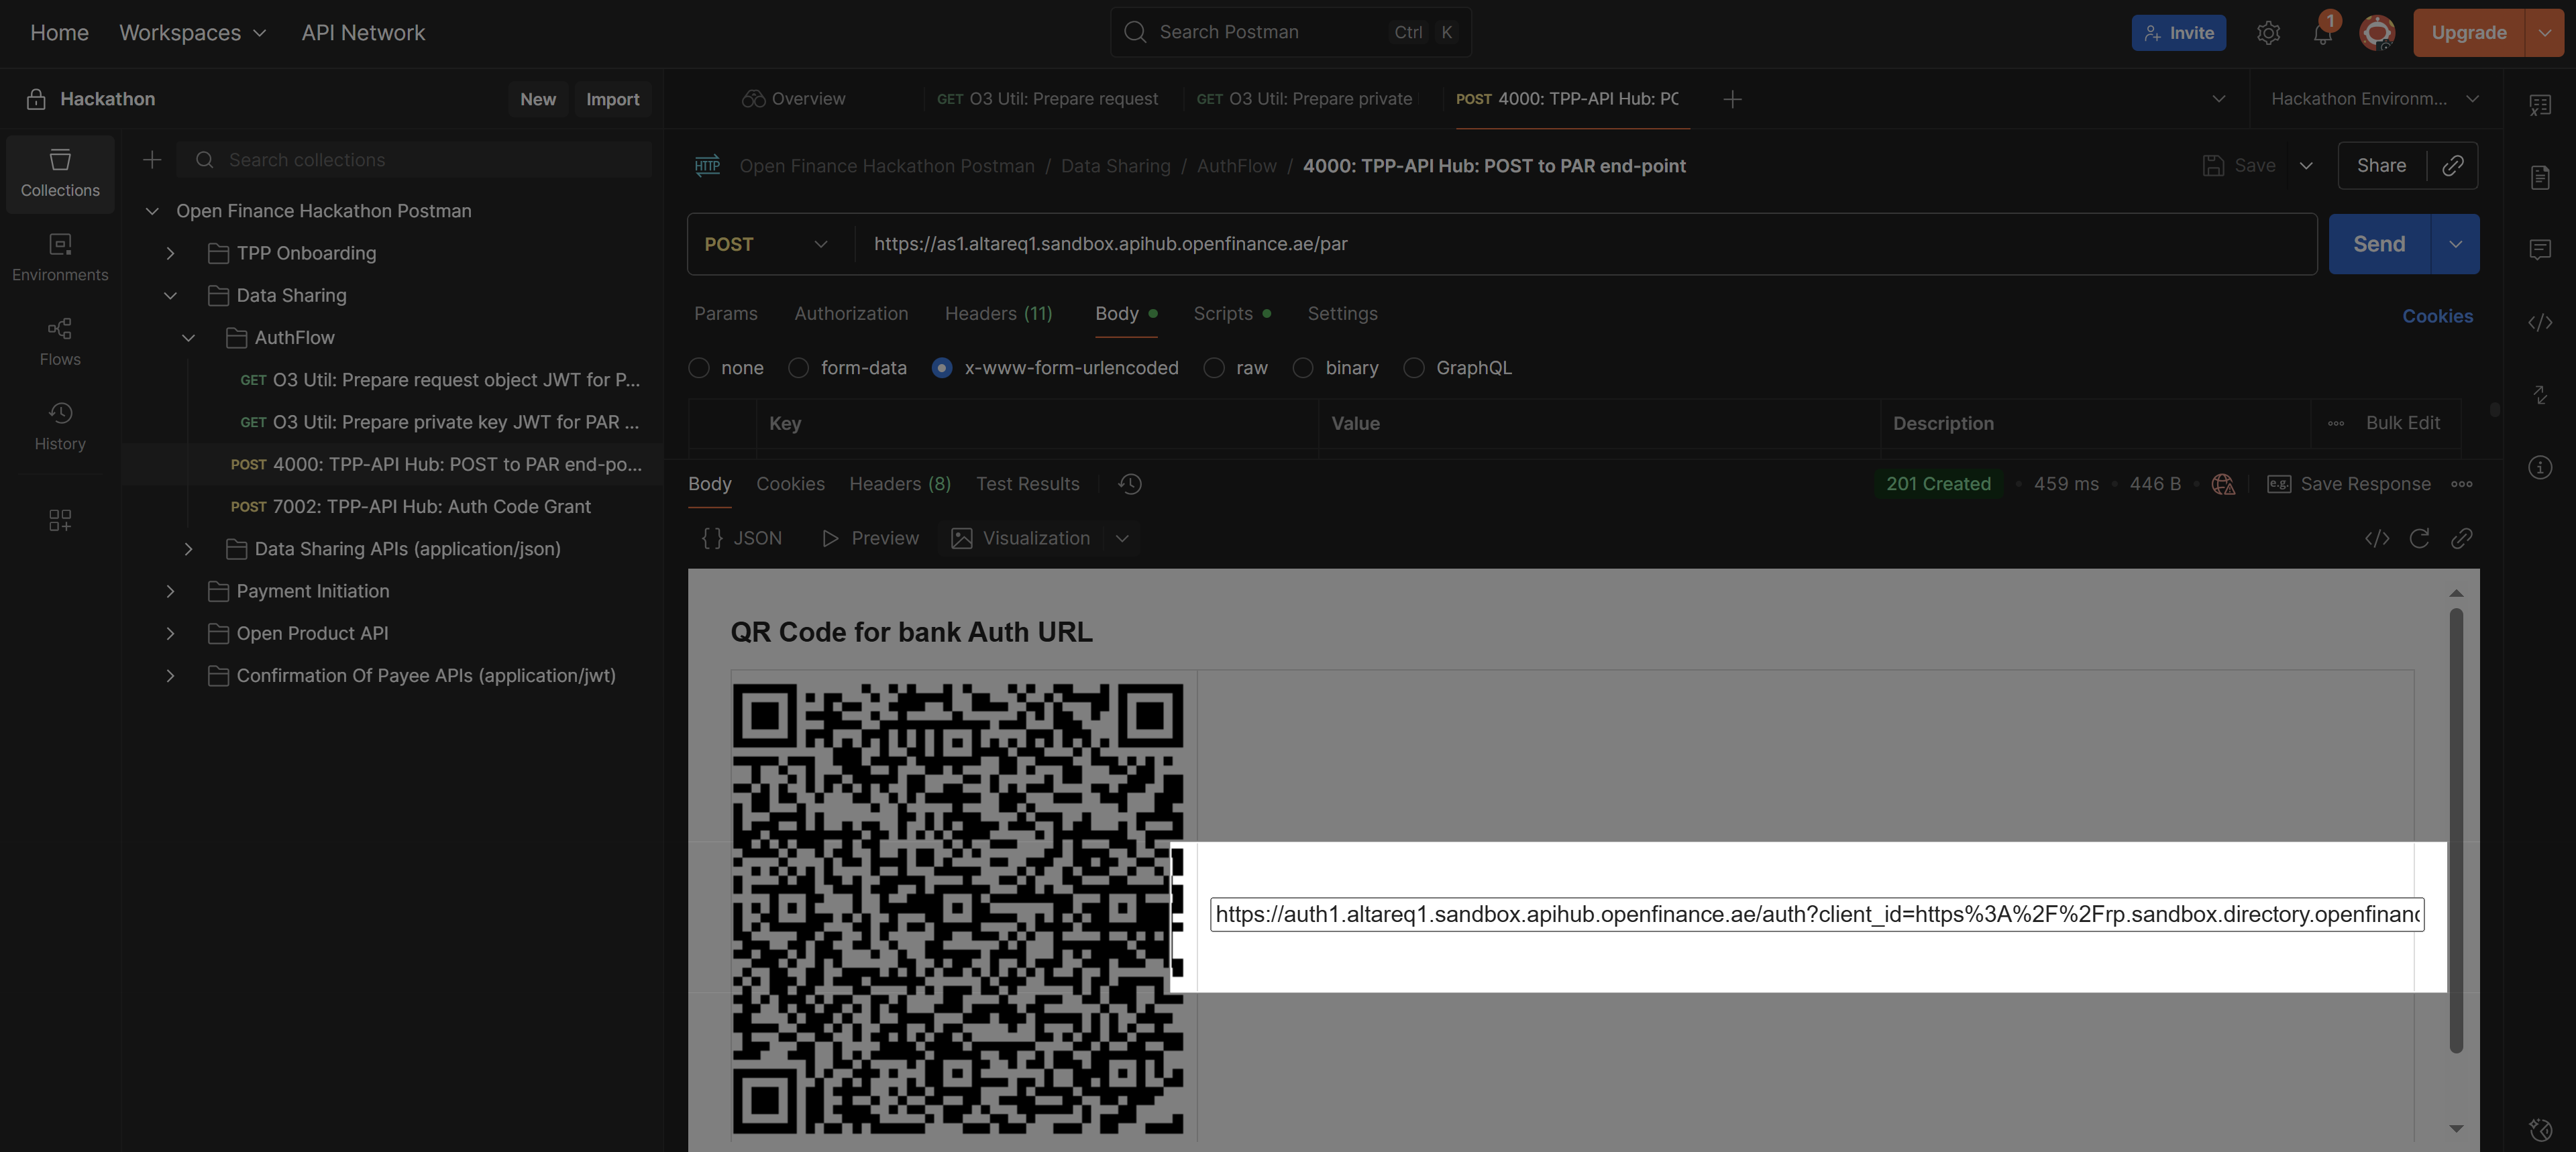
Step 2 – Convert the PAR Response into a Redirect URI
After completing the POST request to the PAR endpoint, you will receive a response containing the information needed to redirect the user to the Model Bank for authentication and consent. In Postman, you can easily extract the redirect link by using the Visualize tab. This displays the redirect URI, which you can then open in a browser to allow the user to complete the authentication and authorization process.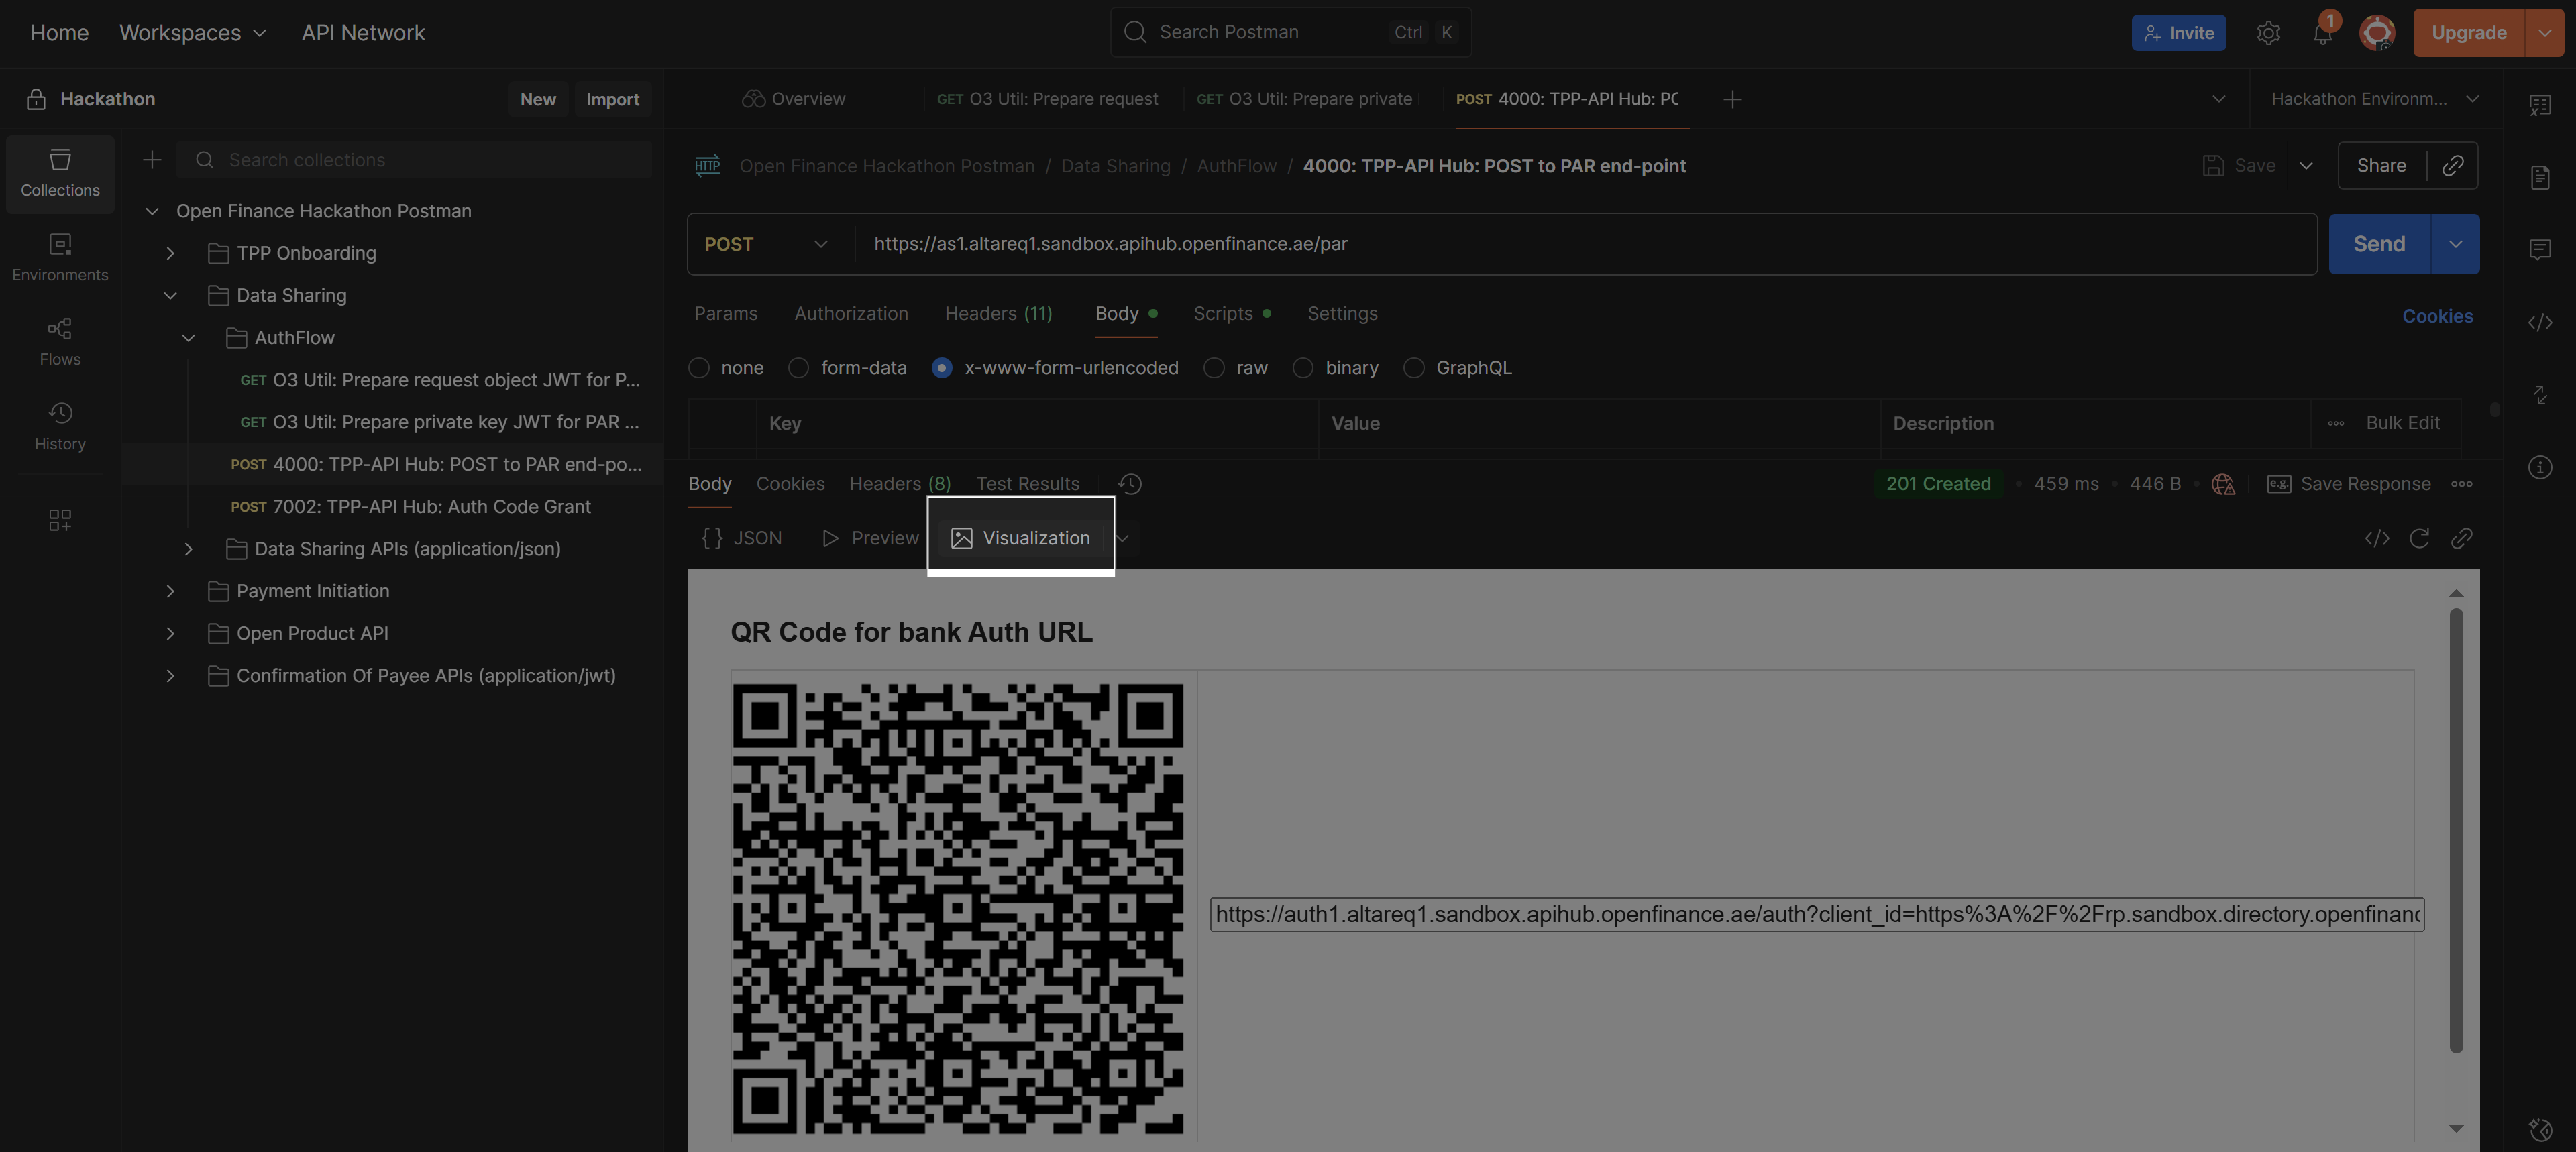
Step 3 – Authenticate and Authorize in the Al Tareq Sandbox Model Bank
Once you open theredirect URL from the previous step, you’ll be taken to the Al Tareq Sandbox Model Bank for authentication and authorization.
Authentication
You’ll need to sign in using the credentials provided in your client pack. These include the username and password assigned specifically for your testing users. After successful authentication, you’ll be redirected to the consent authorization screen.Authorization
On this screen, you will be prompted to select the accounts to share the data from. You’ll also see the details of the consent you created earlier — including:- The data permissions
- The consent expiry date …
http://localhost:1411/hackathon-redirect
with an authorization code.
💡 Tip: Example of a successful callback
http://localhost:1411/hackathon-redirect?code=4c5d6295-ff1b-4d13-a232-1eebacec9a0c&state=9d196e63-9bc2-4c28-8bf9-225c07ce0fc5&iss=https://auth1.altareq1.sandbox.apihub.openfinance.aeStep 4 – Get an Access Token
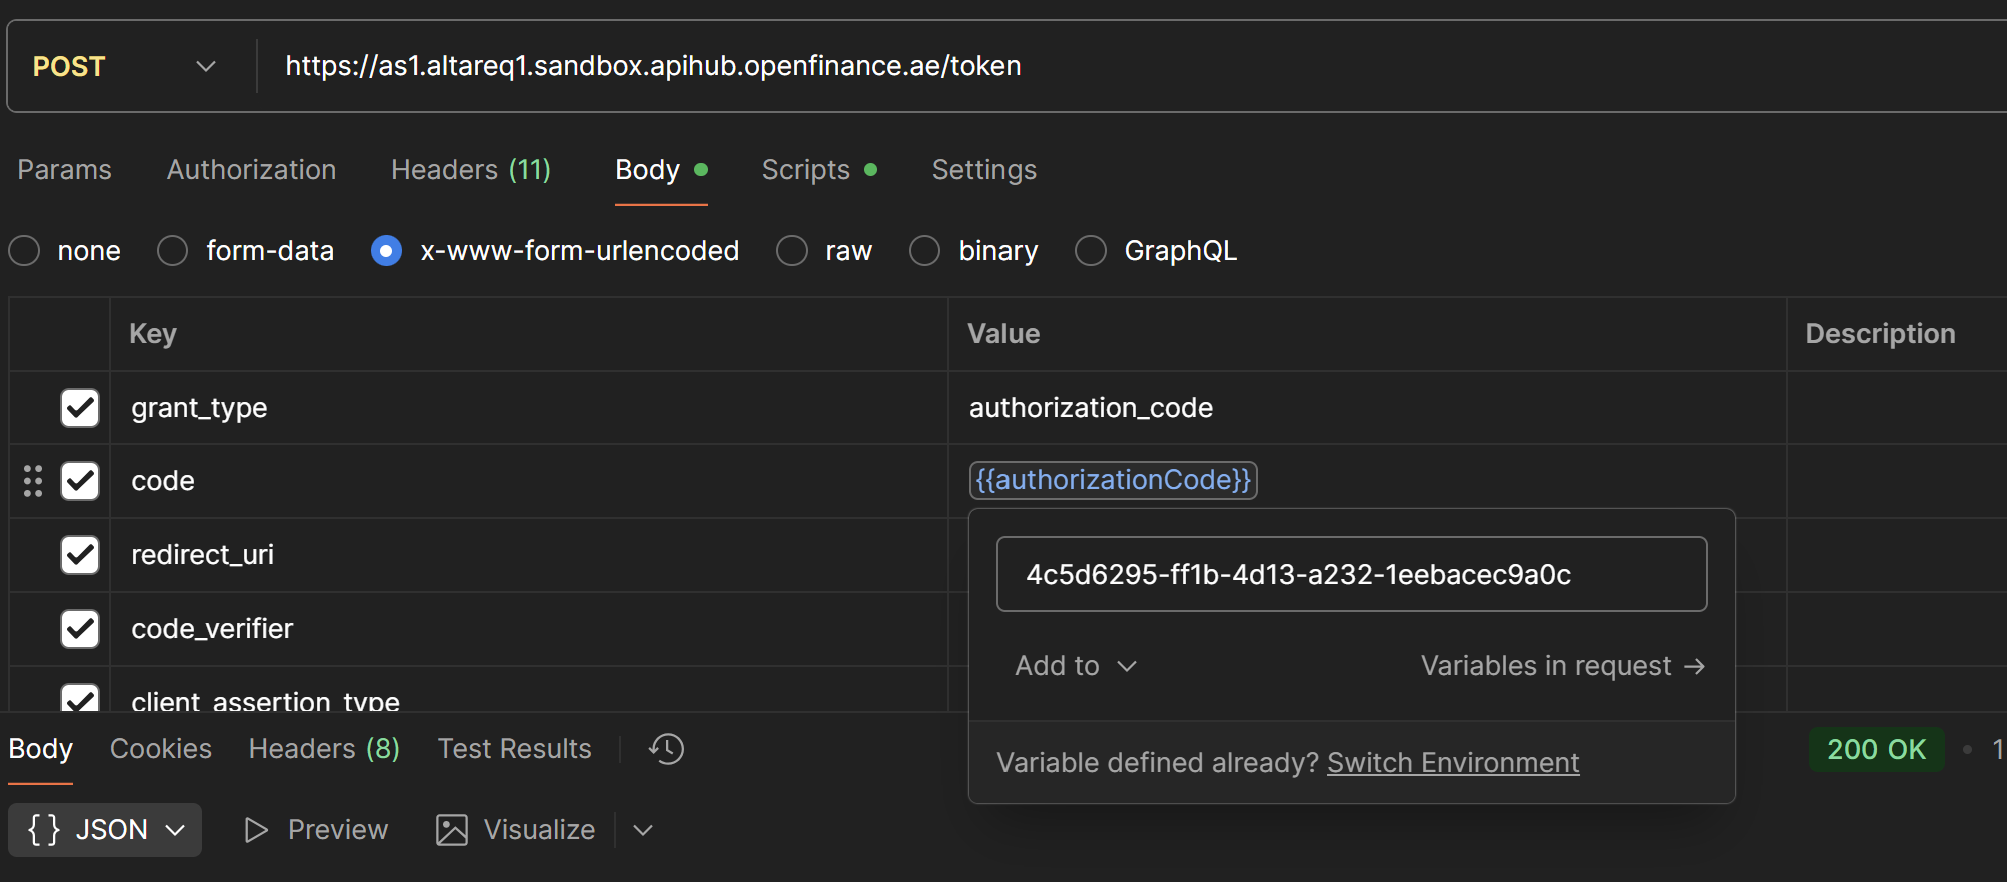
After successfully authorizing the consent in the Al Tareq Sandbox Model Bank, you will be redirected back with an authorization code included in the callback URL. You can now exchange this code for an access token using the following request: Endpoint:https://as1.altareq1.sandbox.apihub.openfinance.ae/token
Set the {{authorizationCode}} variable with the code obtained from the URL.For example, if your callback URL contains the code:
4c5d6295-ff1b-4d13-a232-1eebacec9a0c (like the example above) then that is the value you should use.
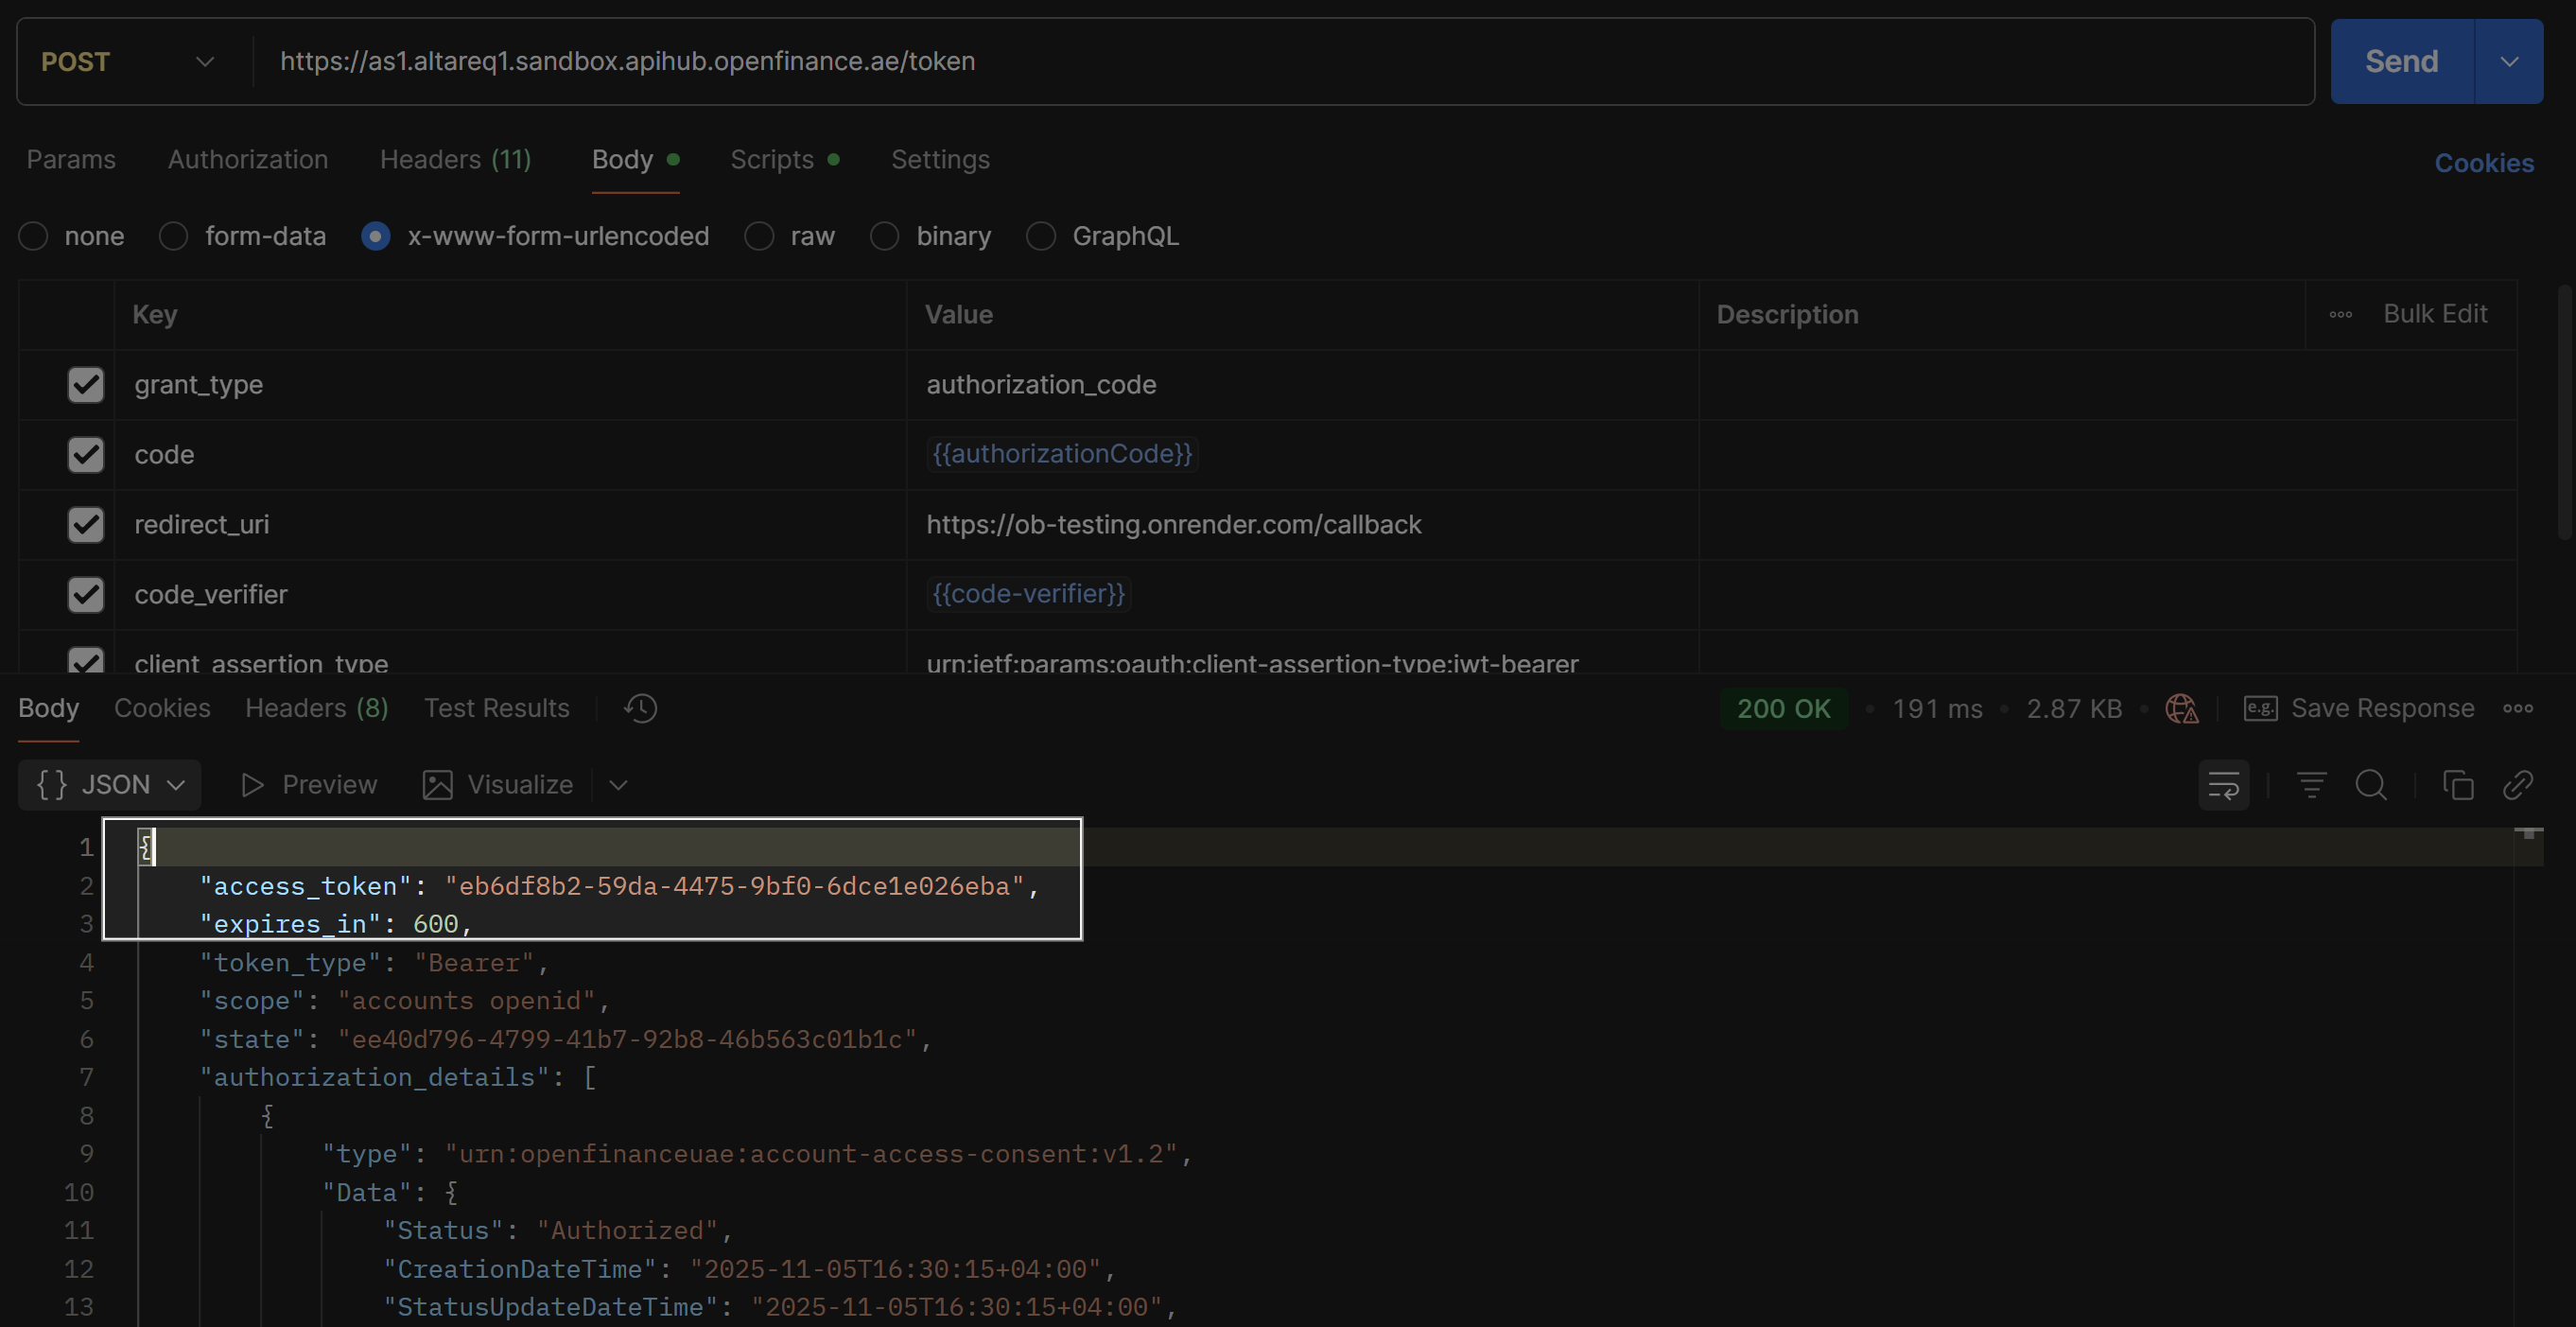
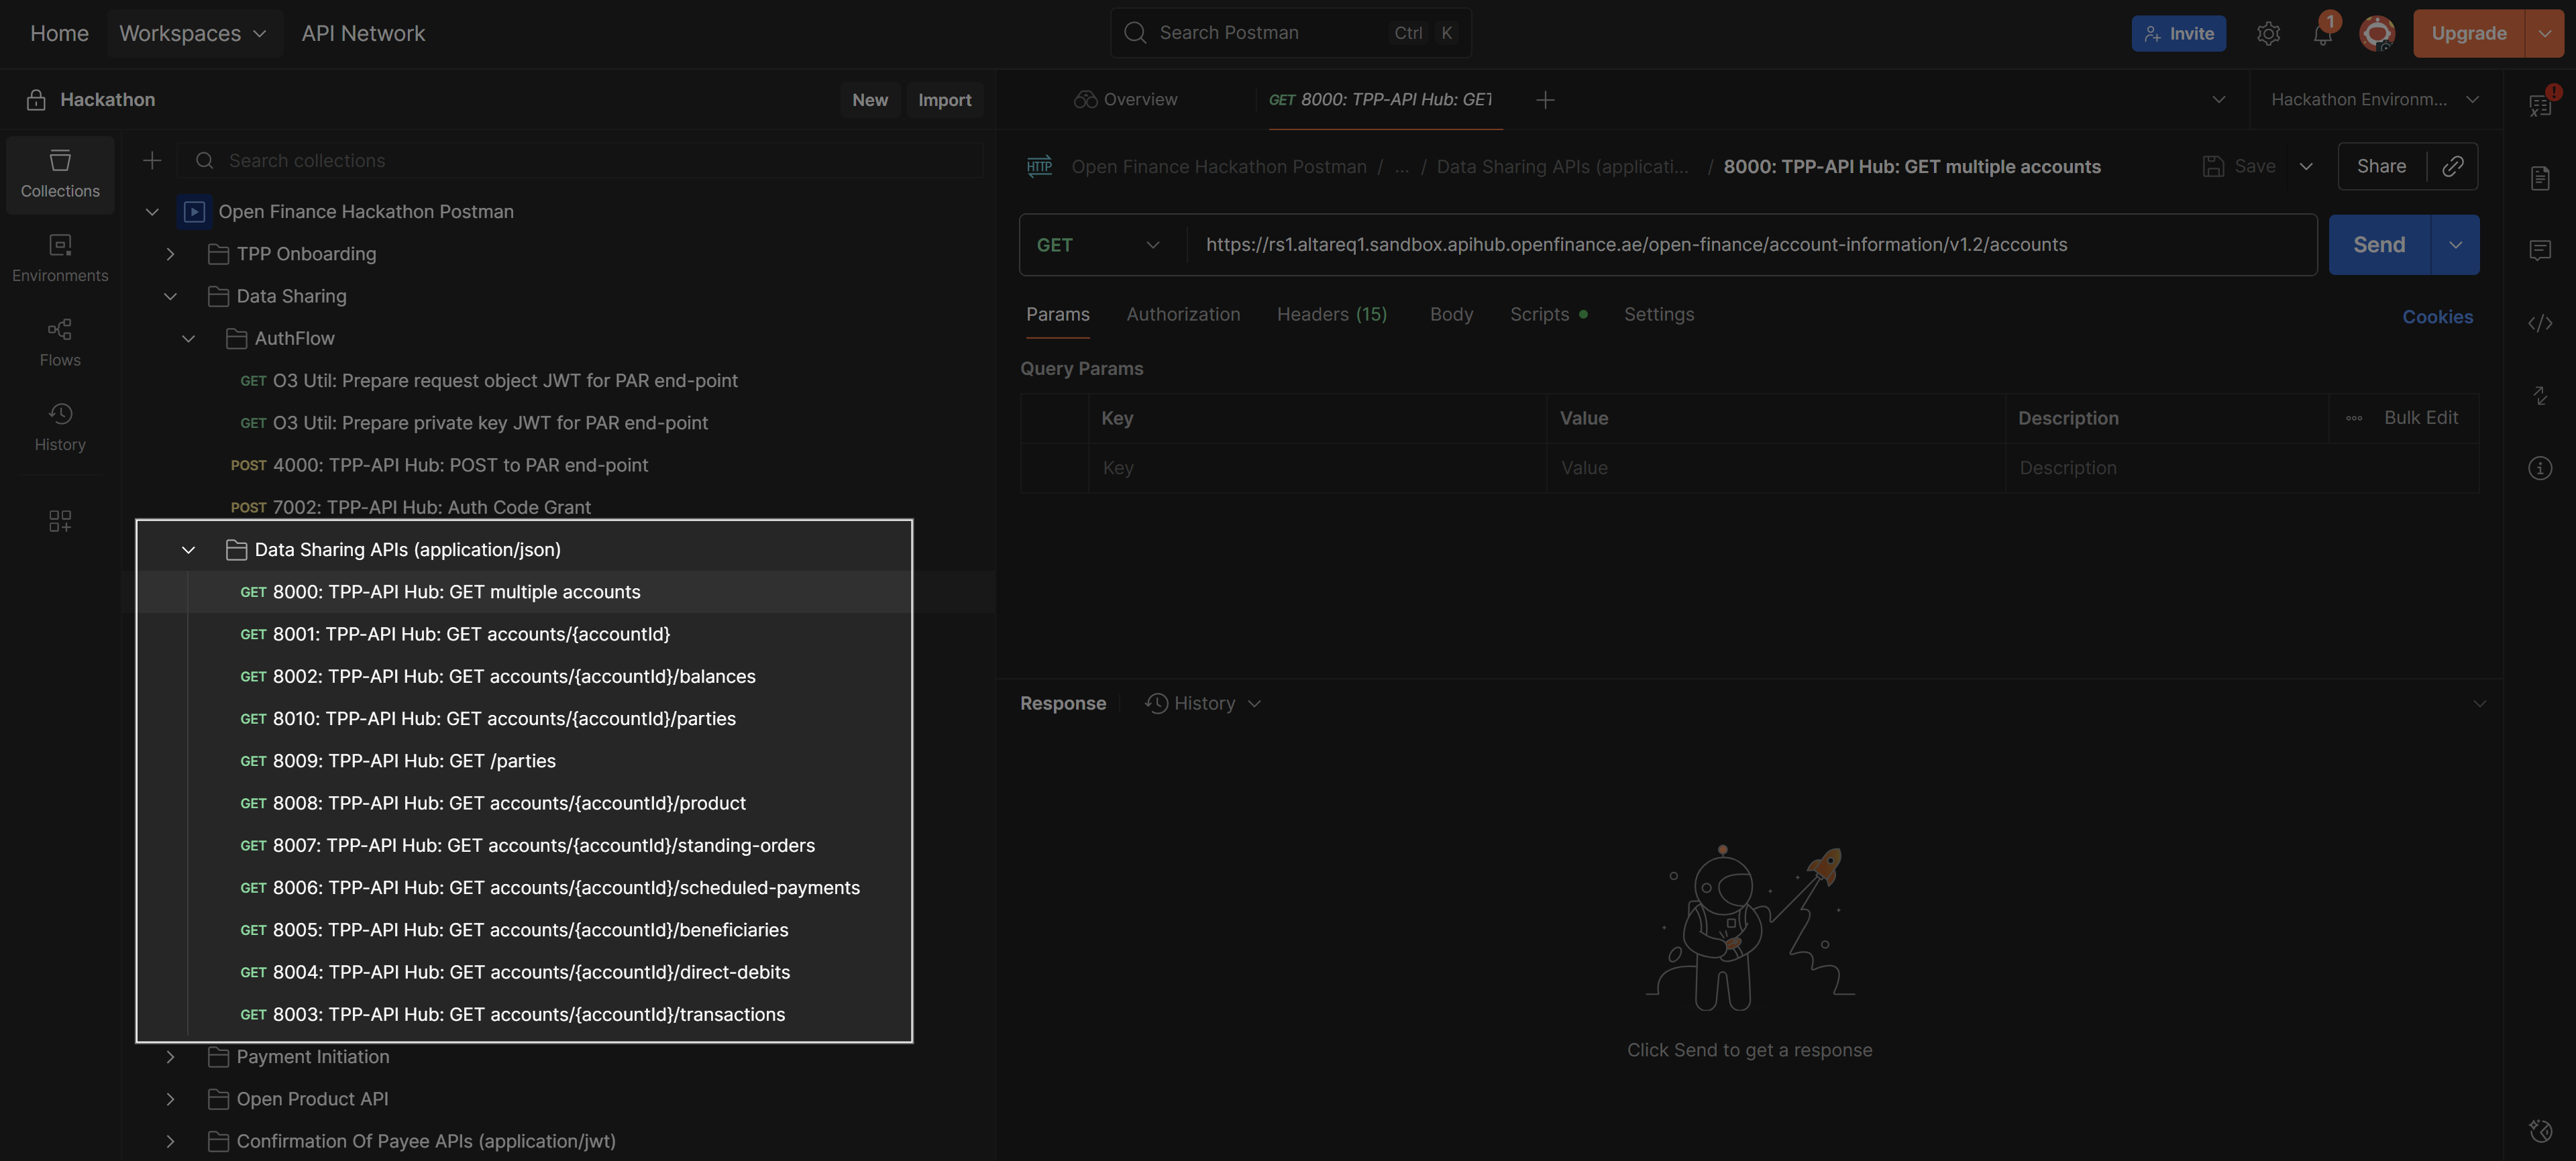
Step 5 – Make Data Sharing Requests
Once you have an access token, you can make data sharing requests according to the consent permissions set in the earlier step (O3 Util: Prepare request object JWT for PAR endpoint).
The Postman will automatically set the token in the Authorization header of your requests to access the endpoints: